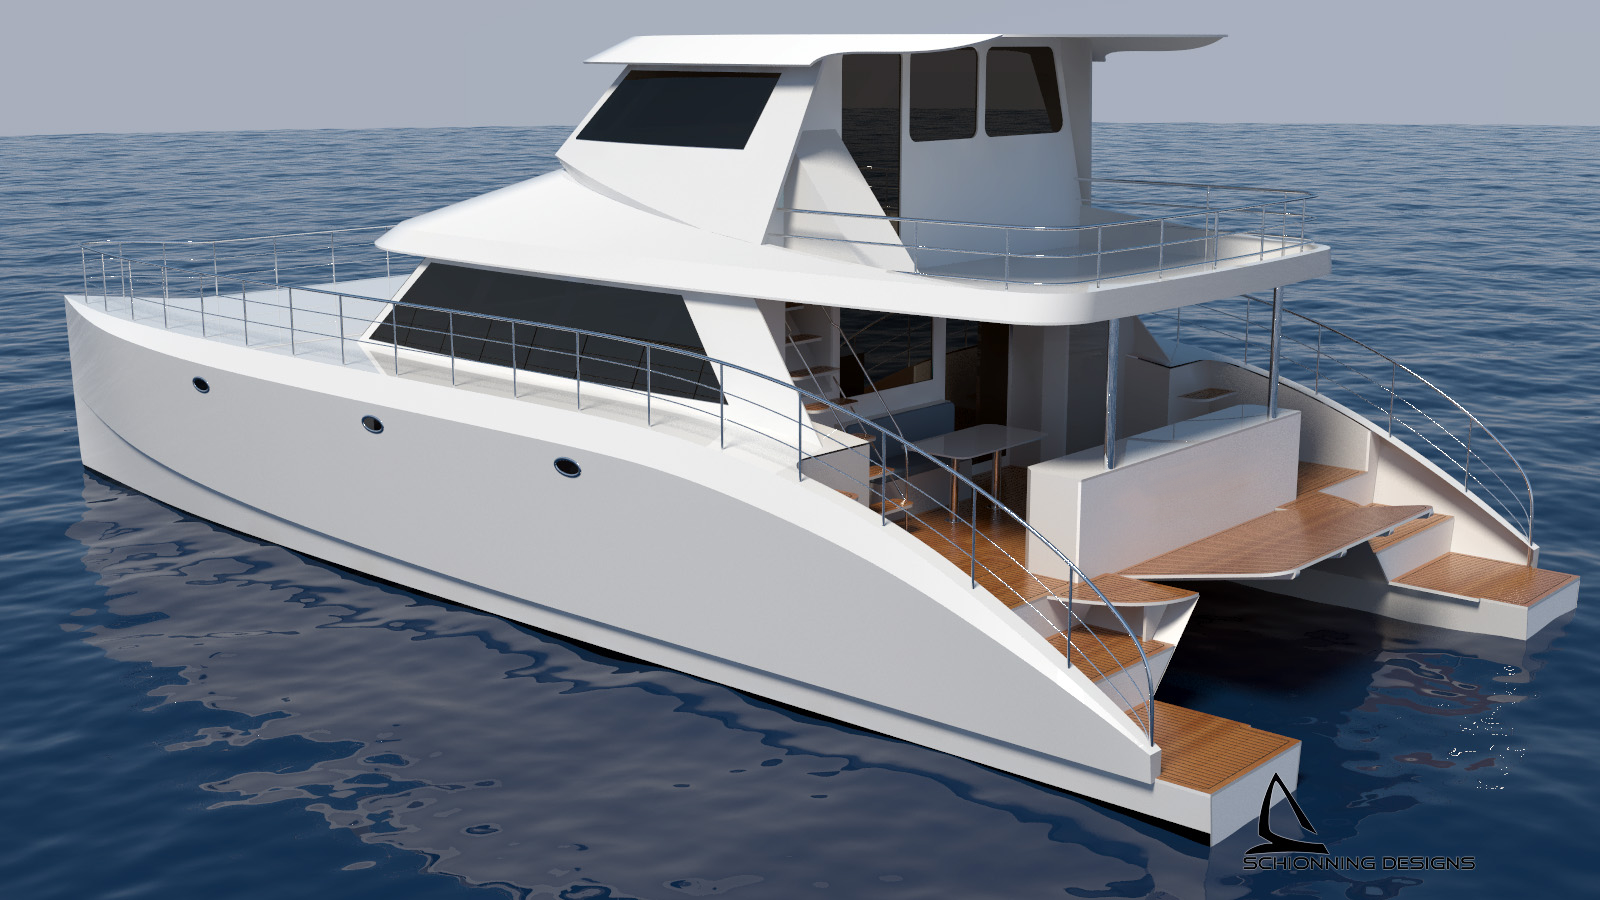
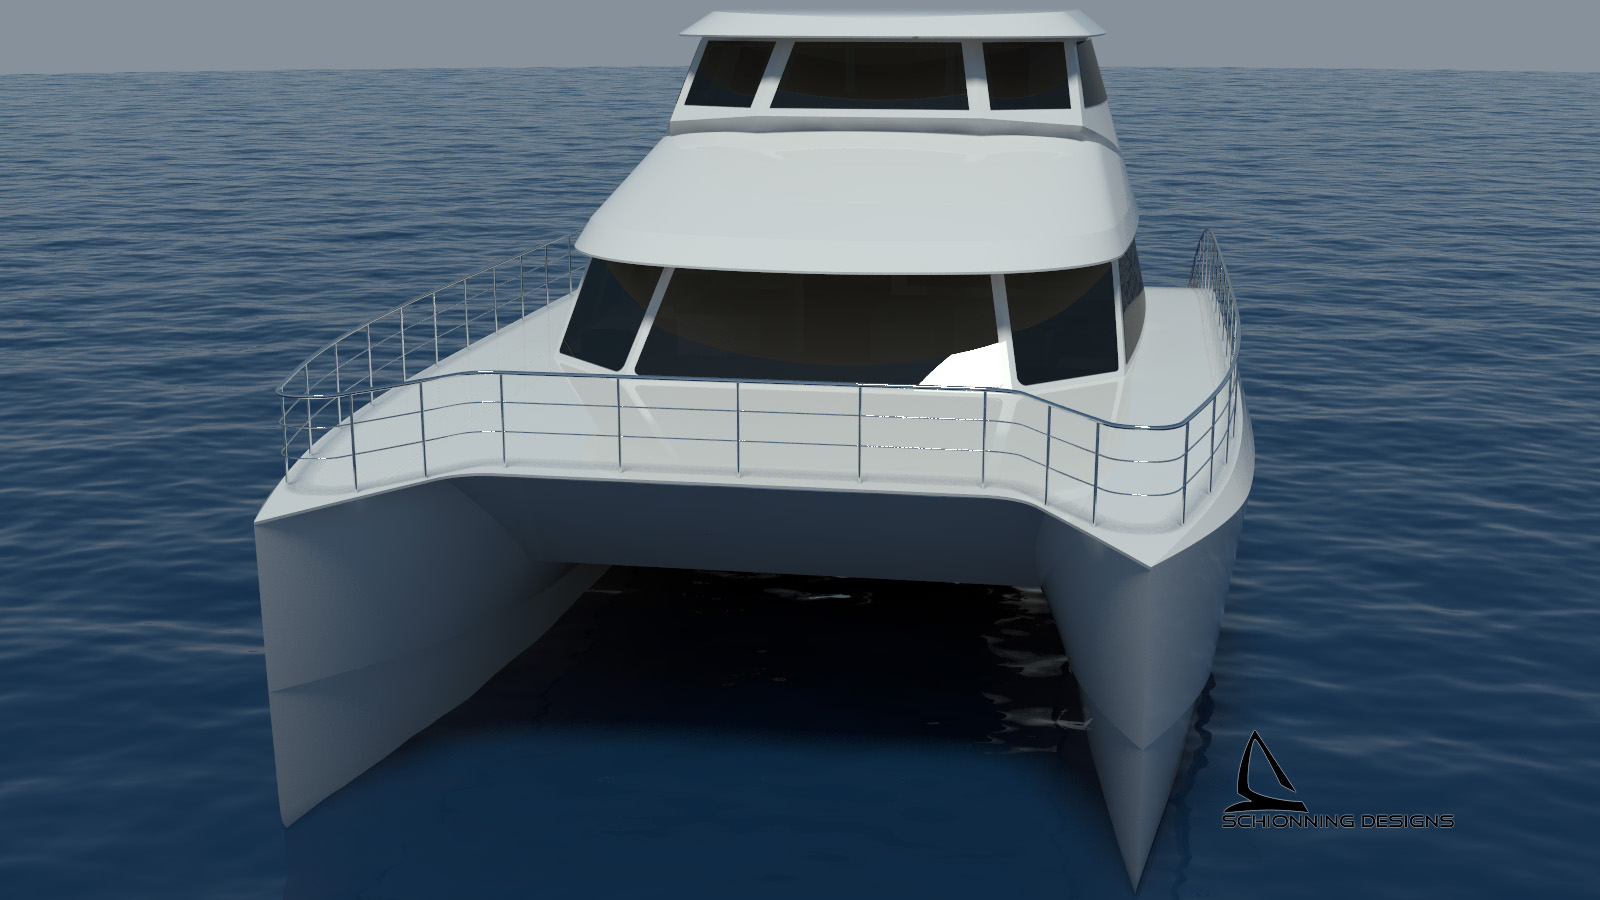
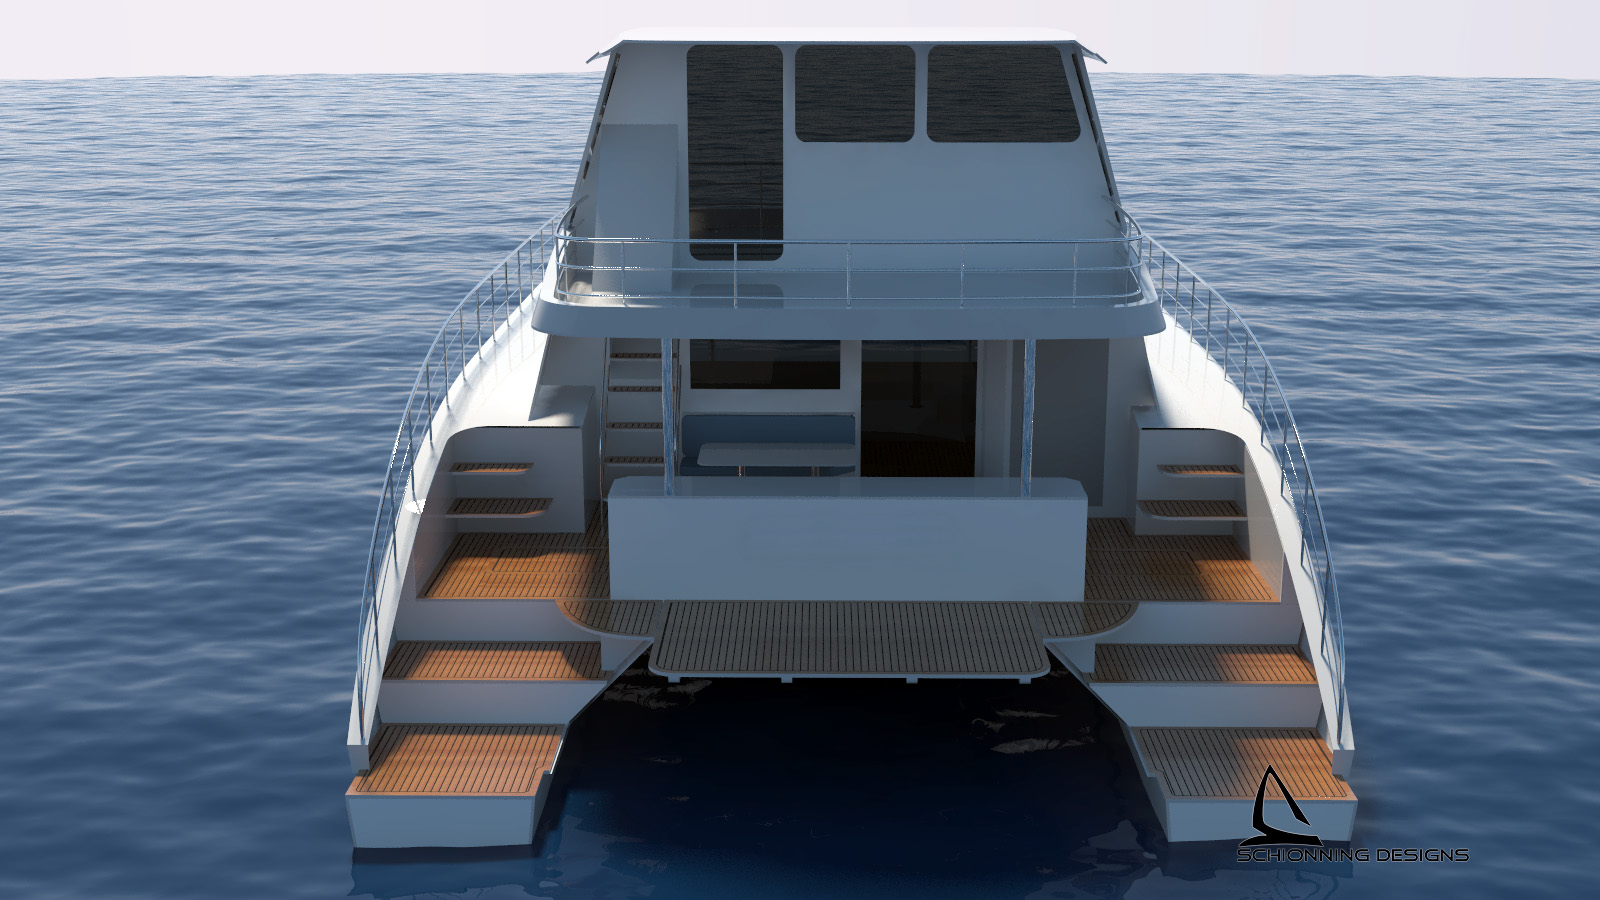
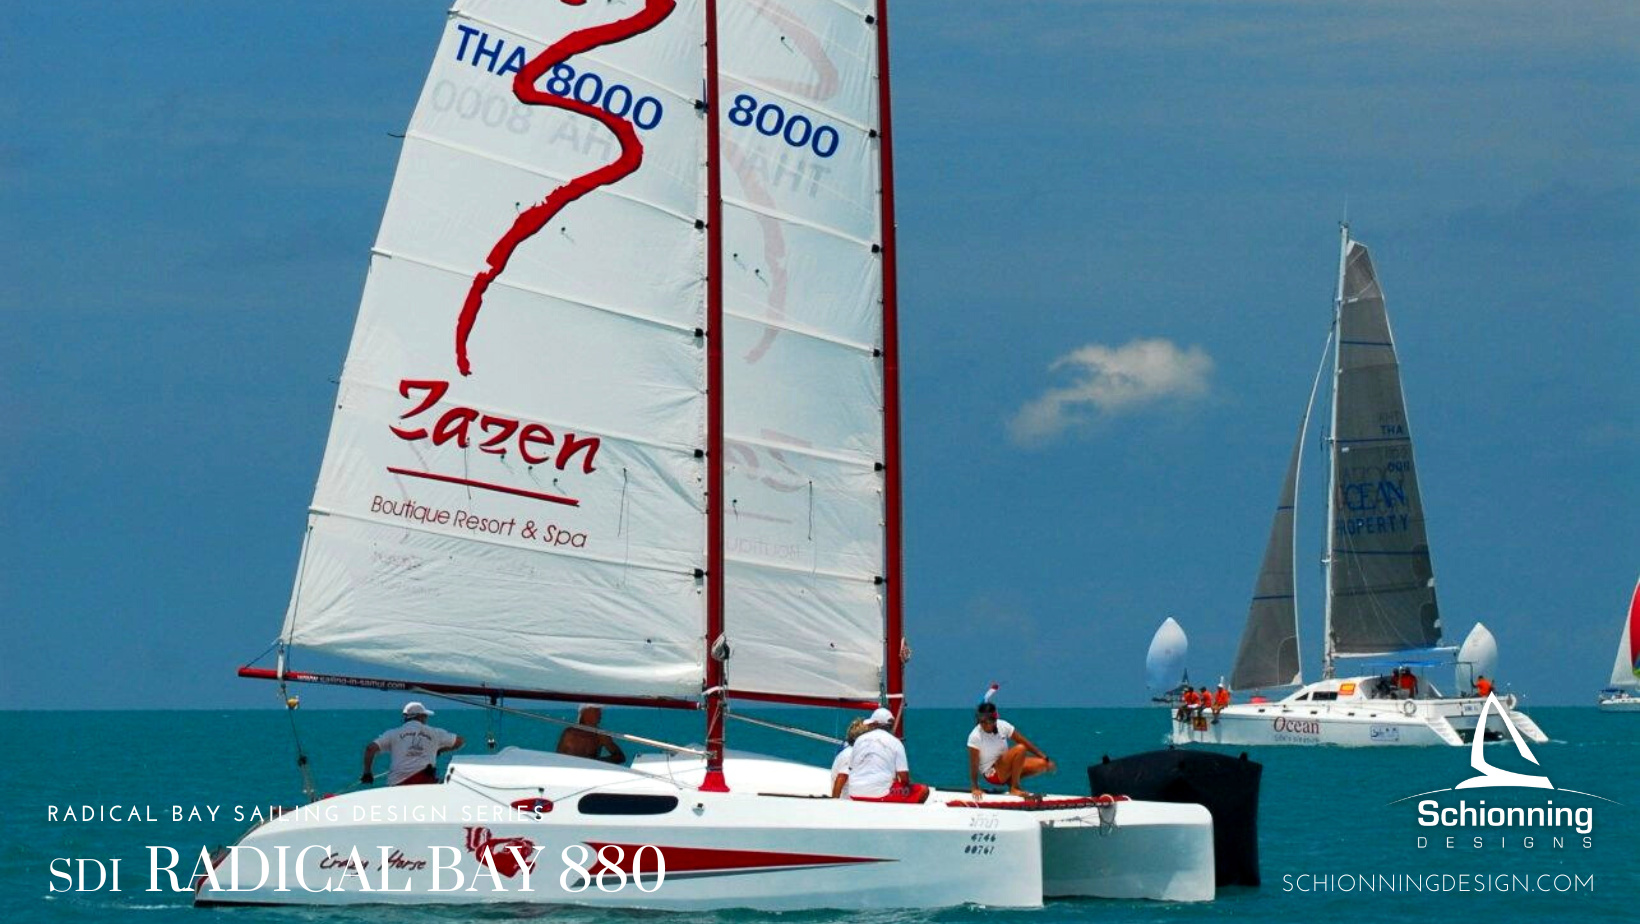
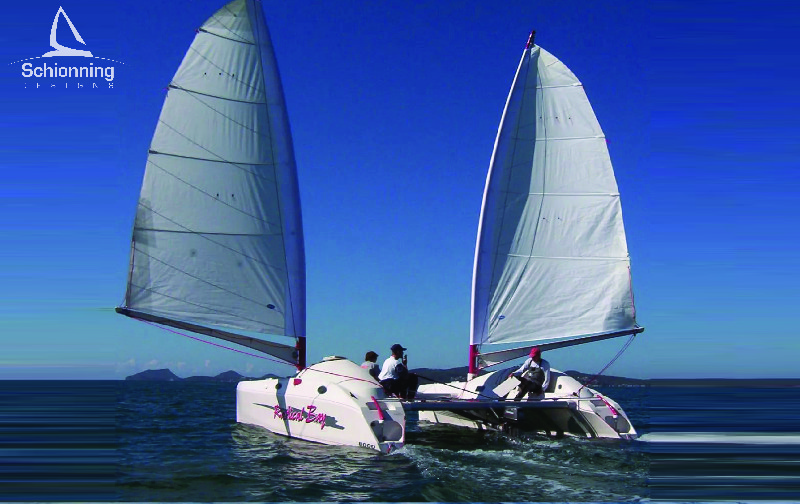
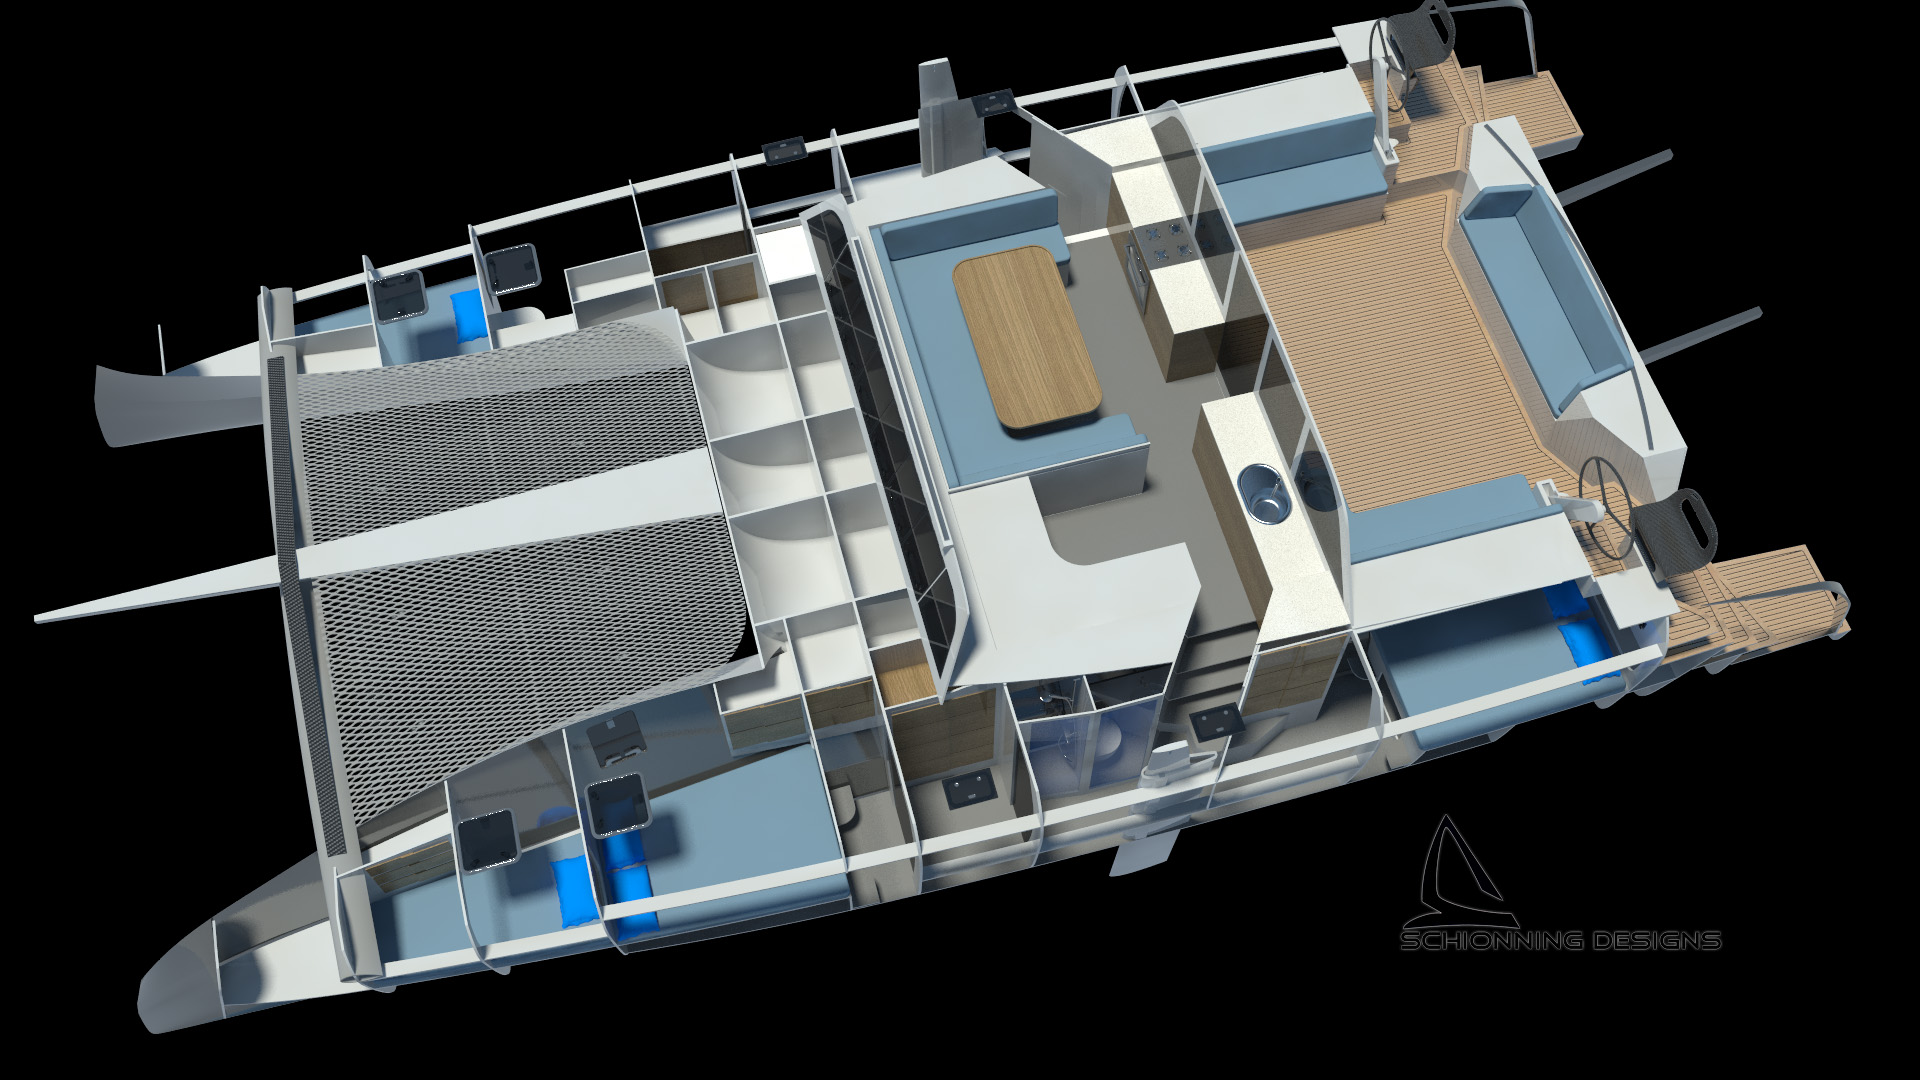
Posted on

Radical Bay 800

Schionning Designs International Radical Bay 8000 Exterior CAD Renders

Radical Bay 800

Schionning Designs Radical Bay 800 is a small weekender or coastal cruising catamaran, that still has enough sea-keeping ability to cross an ocean or two. The bi-plane rig provides amazingly easy sailing. which truly must be witnessed to believe.

A standard rig is an option and is at the owner's discretion. There are a number of Radical Bay 800's on the water, and many have done very well in racing events in Australia and Asia.

For the Radical Bay 800, I have chosen a simple hull form, with a vee section forward to stop slamming running aft to a flat exit to reduce hobby horsing. The asymmetric hull shapes as used on most of our designs benefit the boat in a number of ways.

The layout is surprisingly comfortable for such a small cat especially with good speed being kept in focus: the fwd bunks are comfortable and an aft "double" can easily sleep two friendly people. I have added a cockpit in each hull, the cabin offers some protection but mostly to have a comfortable sitting position with good visibility protected from those annoying unexpected splashes that sneak up through the tramps now and again.

She is definitely the future, an amazing looking, fast, exciting, simple and cheap to build cat. No such thing? True until now. She is a very safe, easy to handle coastal cruiser, a little cat a couple could live on for months at a time and yet easily demounted to transport anywhere if sold.

For more information please download our Study Plans on this design using the link below.

PORTFOLIO

Posted on

Arrow 1201

Arrow1201_CAD Render by Schionning Designs International www.schionningdesign.com #catamarandesign #catamran - The Schionning Designs Team is excited to announce a new high performance cruising design, the modern and stylish Arrow 1201. The Arrow 1201 promises the same sailing experience and performance of the 1200 version yet with a revised interior and cockpit giving more options. The Arrow 1201 has the same layout to the Arrow 1280s.

Arrow 1201

The Arrow 1201 promises the same sailing experience and performance of the 1200 version yet with a revised interior and cockpit giving more options.

Schionning Designs International presents the Arrow 1201 Catamaran,

The Arrow 1201 promises the same sailing experience and performance of the 1200 version yet with a revised interior and cockpit giving more options.

The Arrow 1201 has the same layout to the Arrow 1280s : 4 berths and 2 heads. Other layout options include twin owner’s hulls, or Stbd owner’s hull with Port guest hull, or 5x berths & 1x head/shower. See more details showing the 3 cabin version with stbd owner’s hull and port guest hull. The helm options are: Central Raised Helm (shown), bulkhead helm (twin or single), or dual tiller steering. The Stbd berth has been widened to be a full queen with great volume inside. This required a reshaping of the cockpit compared to the Arrow 1200. The Navigation table is now cleverly in the saloon allowing closet shelves below in port hull.

Australia

Current Build

USA

Current Build

Thailand

Current Build

EXTERIOR

cad renders

INTERIOR

cad renders

Posted on

CM²52 Catamaran

CM²52 Performance cruising catamaran by Schionning designs is designed as a lightweight owner cruiser racer or for theperformance charter owner.

CM²52 CATAMARAN

Designed as a lightweight owner cruiser racer or for the performance charter owner.

The Standard CM²52 built using epoxy resin infused composite E-Glass, 80-130kg/m3 Foam core achieving optimal weight and strength.

Carbon used extensively in locally reinforced structural areas.

The Carbon CM²52 CR built using epoxy resin infused composite Carbon,

80-130kg/m3 Foam core achieving optimal weight and strength.
Externally-spray finish Awl Craft 2000 in light solid colour of choice/Anti-slip/ Antifouling barrier coatings.

The CM²52 is primarily designed for the purist, experienced and adventure cruising racer sailor who wants an efficient fast performing sailing design that is spacious due to its open plan saloon and cockpit.

Designed as a lightweight owner cruiser racer or for the performance charter owner.

View the Current Marine Official Website Here

exterior Renders

Interior Renders

Posted on

CM²46 Catamaran

The CM²46 Catamaran Designed by Schionning Designs is primarily designed for the purist, experienced and

CM²46 CATAMARAN

Designed as a lightweight owner cruiser racer or for the performance charter owner.

The CM²46 is primarily designed for the purist and adventure cruiser racer sailor who wants an efficient fast performing sailing design that is spacious due to its open plan saloon and cockpit.

The Standard CM²46 built using epoxy resin infused composite E-Glass, 80-130kg/m3 Foam core achieving optimal weight and strength.

Carbon used extensively in locally reinforced structural areas.

The Carbon CM²46 built using epoxy resin infused composite Carbon, 80-130kg/m3 Foam core achieving optimal weight and strength.

Externally-spray finish Awl Craft 2000 / Alex seal in light solid colour of choice / Anti-slip/ Anti-fouling barrier coatings.

The CM²46 is primarily designed for the purist and adventure cruiser racer sailor who wants an efficient fast performing sailing design that is spacious due to its open plan saloon and cockpit.

Designed as a lightweight owner cruiser racer or for the performance charter owner.

View the Current Marine Official Website Here

exterior Renders

Interior Renders

Posted on

Recommended Equipment

Catamaran Kit Materials. What do I receive? Schionning Designs supply a list of the Kit Materials you will receive to start the process.

Recommended Equipment

Quality suppliers & manufacturers

The Schionning team have a lot of contact with equipment suppliers and manufacturers, and hear feedback on certain brands or systems from our many customers. There are many Schionnings cruising the world and testing products longevity and the customer service offered by the manufacturer.

Posted on

Technical Information

Catamaran Kit Materials. What do I receive? Schionning Designs supply a list of the Kit Materials you will receive to start the process.

Technical Information

The Technical Information page is a collection of documents (mostly in PDF format) on the materials and systems used in Schionning catamarans. Including data sheets, engineering information, strength comparisons of each core material and informative articles from Jeff outling the design of certain system such as engine choices and main sheet systems.

Detailed engineering data
for your research!

We understand that getting your head around the process of building your own boat, or having one built, can take a little while. To gain a greater understanding of the materials used in our designs, the below data sheets have been supplied by ATL Composites, and contain all of the technical data you could need regarding the composites we use. In addition are articles or documents written by Jeff about certain systems used on our designs and why.

Posted on

Kit Materials Contents

Catamaran Kit Materials. What do I receive? Schionning Designs supply a list of the Kit Materials you will receive to start the process.

kit materials' Contents

So if you order a Schionning kit, what exactly is going to arrive? See an overview of the materials you will receive, and what each is used for during the build process. Fibreglass cloth or tapes? Microspheres, Microballoons or Microfibers? Take a closer look and you can answer these questions.

Our Schionning Kits are a no nonsense, common-sense approach to building a boat. We offer great service, fast delivery and access to anything you could need for your boat straight from the supplier to your door. Our construction plans and kits are sold with 100% professional boatbuilder support via phone and email, any time you're unsure or just need a second opinion, we're here.

Our kits contain all of your basic materials to build your boat to a faired shell stage, ready for painting and fit-out. We have sail-away costing estimates available for all of our standard designs, and this will give you an accurate idea of the overall cost of your project. This costing varies depending on your level of finish, as you can imagine different options vary greatly in price.

Below is a quick glance at what your Schionning Kit will include and what each item is primarily used for, we hope this is helpful and if you should require more detailed information please don’t hesitate to contact our office.

What do I actually receive?

Superlight Balsa - End-Grain Balsa - Foam - Paper Honeycomb - Western Red Cedar - SDI - End-Grain Balsa - 150kg per cubic metre Paper Honeycomb - 50kg per cubic metre Superlight Balsa - 94kg per cubic metre Western Red Cedar - 360-380kg per cubic metre - Foam

DUFLEX PRE-LAMINATED PANELS

DuFlex pre-laminated panels are the main and most important material used in our kits, predominantly in the flat panel designs, however they are used in Strip-planked designs also, though to a lesser extent. These panels are 2400mm x 1200mm and are CNC routed to speed up build time on our Wildernes X Series, as well as some of our power designs. For internal furniture, a paper honeycomb core is used instead of the end-grain balsa wood core that is used for main structural areas. The use of this is purely to save weight in the shell and therefore produce a faster, more responsive catamaran.

Schionning Catamaran Kit Materials contain Kinetix Laminating Resin & Hardener Kinetix Laminating resin is used on all of our designs and is used for laminating the strip-planked areas, so round-bilge designs will use it more often whereas our flat panel designs not as much.

KINETIX LAMINATING RESIN & HARDENER

Kinetix Laminating resin is used on all of our designs and is used for laminating the strip-planked areas, so round-bilge designs will use it more often whereas our flat panel designs not as much.
 
The reason we use Kinetix is that it has a much higher heat resistance than West System epoxies and for larger surface areas that will be in direct sunlight it is the safest solution.
 
The Kinetix resins are mixed by weight/volume at a mixing ratio of 4:1.
Resin Choices for Catamaran Kit Building by Schionning Designs SDI - We choose ATL Composite's resin systems for their superior quality, reliability and value for money. West System Epoxy Resins

WEST SYSTEM EPOXY RESINS

The West System range is the most widely used composite epoxy system in Australia and the World when it comes to marine applications. Trusted and recommended across the globe, these products are used for most of the gluing applications involved in your build. Pumps are sold for mixing the resin and hardeners, at a ratio of 5:1. The pumps ensure that 1:1 pump ratio will equate to exactly 5:1 resin to hardener. West System hardeners come in a variety of drying speeds from Fast to Slow and everything in between. This is important when certain jobs require more or less drying time, or when working in different environments and temperatures. The West System fillers are Microlight, Microfibres and Microspheres and these are used for either fairing, gluing, filling or coving in corners etc. These powders are mixed with the resin and hardener to form a putty of desired viscosity.
Fibreglass Tapes (Double Bias) These double bias fibreglass tape rolls are used for the joining of panels in our flat panel designs, or in round-bilge designs to a lesser extent. Anywhere that DuFlex panels need to be joined, tapes will be used. The smaller rolls come in different widths for ease of use and to save time on cutting larger rolls of cloth.

FIBREGLASS TAPES (DOUBLE BIAS)

These double bias fibreglass tape rolls are used for the joining of panels in our flat panel designs, or in round-bilge designs to a lesser extent.
 
Anywhere that DuFlex panels need to be joined, tapes will be used.
 
The smaller rolls come in different widths for ease of use and to save time on cutting larger rolls of cloth.
 
Schionning Designs Catamaran Kit Materials Carbon Fibre Cloth Carbon fibre is used on a number of our designs and can be incorporated into any design to save on weight and increase the performance capabilities. Carbon comes in unidrectional and double bias, however is much more expensive than standard fibreglass (as one might expect). It is very similar to work with, however the resin choice may change when using carbon.

CARBON FIBRE CLOTH

Carbon fibre is used on a number of our Schionning Catamaran Designs and can be incorporated into any design to save on weight and increase the performance capabilities.
 
Carbon comes in unidrectional and double bias, however is much more expensive than standard fibreglass (as one might expect). It is very similar to work with, however the resin choice may change when using carbon.
 
Schionning Designs Catamaran Design Kit Materials Fibreglass Cloth Fibreglass cloth is the strength and stiffness that holds your boat together, this is used in most areas for strength and is used in a variety of techniques depending on the area or job that is being performed. Fibreglass is one of the most widely used materials for low weight and high strength properties.

FIBREGLASS CLOTH

Fibreglass cloth is the strength and stiffness that holds your boat together, this is used in most areas for strength and is used in a variety of techniques depending on the area or job that is being performed.
 
Fibreglass is one of the most widely used materials for low weight and high strength properties.


Posted on

The Kit Process

Catamaran Kit Materials. What do I receive? Schionning Designs supply a list of the Kit Materials you will receive to start the process.

The Kit Process

Building your own boat can be a daunting prospect, however to demonstrate each step in the kit assembly process, we've created this guide for you to study. As you can see our kits are the ultimate in building efficiency and have been streamlined over 30+ years to ensure that you're on the water faster and with less effort.

How does it all go together?

STEP 1

The first step to building your dream catamaran begins with a strongback – this is a square frame used to position the temporary frames that will be used to form the hull shape. This frame will be set up and must be square and accurate, a string or laser level can be used to achieve this.

STEP 2

Once you have released the pre-cut frame panels, they are erected along the strongback in sequence. The hull panels will be laid over this framework to form our hull shape.

STEP 3

Here we can see the hull has now been taped and glassed, ready for turning soon. Once this has been completed the hull will need to be rolled over and the process repeated to produce the second hull. The use of flat panel construction techniques and the time-saving element of pre-cut kits really becomes noticeable. Having this head start is invaluable and could save almost 1000 hours on your build. (Wilderness 1100 design shown.)

STEP 4

The fairing is now complete, this is done using a filler compound mixed with our West System epoxy resin and applied to the surface of the hull. This process is to ensure that when painted the boat will have a smooth and glossy appearance, and as a general rule the more painstaking the paint-job and fit-out, the higher your resale value.

STEP 5

Now comes the turning of the hull! There are many different ways to do this, some involve cranes or complex equipment, however the smaller designs can simply be turned with a few extra pairs of hands, or a block/pulley set-up. Once both hulls are turned the tops of the bulkheads will be used to join the two hulls, and then the bridgedeck component will be installed underneath.

STEP 6

The hull now turned, the second must be positioned and aligned before the large bulkhead panels are used to fix these together. Once this is complete, she will start to look like a catamaran!

STEP 7

The forebeam is now installed along with the striker attachment fitting, as shown above. The bridgedeck is installed shortly after and taped onto the bulkheads with webs installed, this now completes what is a quite stiff and strong platform to work on.

STEP 8

Now that the bridgedeck is in place, the forward webs and dash will be fitted. At this stage, all furniture and internal work begins, with the main panels left off for ease of access when working.

STEP 9

The internal furniture is now installed, if you chose Kit Option 2, this furniture will be pre-cut to your previously decided upon layout. If you chose to receive blank panels, this is the period in which your internal living areas are to be built. This construction uses paper-honeycomb Duflex panels, as these are superior in weight when used non-structurally. Cabin soles, engines and daggerboard cases are also now installed.

STEP 10

The transoms and cockpit area are now completed, along with the targa bar, if you’ve chosen this option.

STEP 11

The next step is our hull-to-deck joins, side decks and close the shell. As you can see strip planking methods are used here to ensure a pleasing design to the eye. This technique is not difficult and the planks are once again glassed in place to ensure again stiffness and strength.

STEP 12

The cabin roof will have been built seperately from the boat, and dropped onto the bulkheads when needed. The cabin sides are then installed and we have a cabin. The next step is to carefully mark our window lines and get cutting.

STEP 13

Cutting of hatches, portlights and your saloon windows is now done, edges must be cored. Interior and exterior painting can now be completed after fairing.

STEP 14

Fairing is now completed and your final finish needs to be achieved. How extravagant you want to get with paint choices and decals is up to the owner and the project budget.

STEP 15

Fairing is finished up and the shell is ready for painting. This is as far as the Schionning kit will get you – from this point on the finishing touches, rig and deck hardware, equipment and appliances must be installed along with finishes such as carpet, roof linings etc. We can supply you with a rough sail away estimate based on other finished projects of a similar size when enquiring about a design, so don’t hesitate to email us if you’d like to investigate further, the build process can take a while to get your head around and we certainly understand that.

STEP 16

Once installation of major systems and finish has been completed the boat can be launched. Again this is something that should be planned beforehand however our designs can safely be loaded onto a flatbed semi-trailer sitting solely on their bridgedeck without any problems. So as long as you’re within a reasonable distance, a simple truck hire should be sufficient for your launch.

STEP 17

Once the mast is stepped, its time to go sailing!

THE LAUNCH

Building your own boat is a rewarding experience and you’ve built a valuable asset on which you can make a considerable profit. If you have any questions regarding build options or designs, please contact us by email, or via the contact page.
Posted on

Material Choices

Superlight Balsa - End-Grain Balsa - Foam - Paper Honeycomb - Western Red Cedar - SDI - End-Grain Balsa - 150kg per cubic metre Paper Honeycomb - 50kg per cubic metre Superlight Balsa - 94kg per cubic metre Western Red Cedar - 360-380kg per cubic metre - Foam

schionning Material Choices

solutions that work best for catamarans & why?

Our designs are based on cored composite construction techniques using West System epoxy resin and knitted fabrics. But given the range of today's composite technologies, which solution works best for catamarans and why? Written by Jeff Schionning

SELECTING THE CORRECT MATERIALS

Resin Choices for Catamaran Kit Building by Schionning Designs SDI - We choose ATL Composite's resin systems for their superior quality, reliability and value for money.We use West System epoxys for their high strength and adhesive values.

It also fully protects the boat against water absorption and it can not develop the dreaded Osmosis.

We choose ATL Composite’s resin systems for their superior quality, reliability and value for money.

Having worked closely with the ATL Composites team and their products for many years, we know we can stand by their material solutions, and rely on great service should something unexpected happen.

Colan brand cloths for their quality and low resin absorption - Schionning Designs SDI - We prefer Colan brand cloths for their quality and low resin absorption, custom made for Schionning Marine at six (6) stitches per square inch for easy wet-out and rounding corners.We prefer Colan brand cloths for their quality and low resin absorption, custom made for Schionning Marine at six (6) stitches per square inch for easy wet-out and rounding corners.

This may not seem important but when working with a material for an extended period of time, the small things make all the difference.

Superlight Balsa - End-Grain Balsa - Foam - Paper Honeycomb - Western Red Cedar - SDI - End-Grain Balsa - 150kg per cubic metre Paper Honeycomb - 50kg per cubic metre Superlight Balsa - 94kg per cubic metre Western Red Cedar - 360-380kg per cubic metre - FoamThe core choice is usually quite confusing. Cores have different capabilities and properties, and their benefits I feel are utilized fully in our catamaran designs. A quick look at their abilities:


  • End-Grain Balsa – 150kg per cubic metre
  • Superlight Balsa – 94kg per cubic metre
  • Western Red Cedar – 360-380kg per cubic metre
  • Foam – 80kg per cubic metre

Balsa has very good values and we can produce a shell using a very light laminate. It will be very stiff and very resilient to fatigue.

It has exceptional qualities including very high compression strength, extremely good sheer capabilities and fantastic sheer stiffness.

Compressive strength is the resistance to collapsing when pressure is applied perpendicular to the surface as when pushing directly onto the material with the point of your finger. Balsa is far stronger than Foam (80kg/cubic metre) in compression.

Balsa is also very strong in shear. This is when the core sample is held flat between your hands, one hand slid one way and the other slid the opposite way, when the core tears through the middle the core has failed in sheer. The amount of stretch you feel before the core shears is shear stiffness. To compensate for sheer weakness the core is made thicker. So 13mm Balsa may be equal in sheer to 19mm Foam.

(80 to 200 kg/m³)

There are many boats sailing that are built from foam as it’s mechanical properties are good for boat building.

  1. Initially one would expect this cat shell to be lighter as it is ½ the weight of Balsa. We do have to compensate for its weaknesses and will then add to the reinforcement the reinforcement on the outside to spread that compression load over more core and need a triaxial type weave to compensate for the veneer content that runs fore and aft on the Durakore.
  2. Secondly, we need to increase the Core thickness to compensate for the shear value, usually neutralizing the weight advantage.
  3. We only use structural foam core that is closed-cell and cross-linked.

The end result using foam core amounts to a very similar total boat weight. Professional builders can achieve a good result but usually use vacuum bagging and very good molds to achieve this.

Secondary Issues

Balsa can absorb water. It needs extreme neglect to rot (very unusual). Water soaks along the end grain quickly. It travels very slowly across the grain. We use balsa under the waterline especially because of it’s high compression strength for beaching etc. any core type must be sealed. Damage to all cores results in the same sort of repair. Notice a damp spot remaining when drying out to anti-foul… simply grind back the surface glass exposing the core, dry it out and re-glass – it’s that easy.

Timber cores are cheaper than Foam in most cases.

A light, high tech cat returns a far better (often 2 – 3 times) re-sale than lower tech materials. Often saving $10,000 on materials initially, loses $200,000 on re-sale – a serious reality.

Our boats can be built using Balsa, Foam or Western Red Cedar. Combine strength, stiffness, lightness and cost, with ease of use – it just makes good sense!

Posted on

‘DUET’ | Arrow 1360

'DUET' Arrow 1360 Catamaran Design by Schionning Designs 1

'DUET' | Arrow 1360 Catamaran

Geo Uhrich, owner of 'DUET' the first Arrow 1360 to be launched, speaks about his experiences cruising in Spain and commends the boat's sailing ability.

'DUET' Arrow 1360 Catamaran Design by Schionning Designs 1

Arrow 1360 DUET Built in South Africa - SDI 43Owner Geo Uhrich speaks about DUET’s impressive performance and his experiences while cruising in Spain. 

“It was fun to show a 50’ production cat how we can sail to windward in 8 knots of breeze and maintain over 8 knots of boat speed! They actually motored right up to our stern and had a good look to see what the heck we were doing that could beat them so soundly! Great fun! The best thing about DUET so far is how well she sails. We love the fact that we can sail in as low as 6 knots of true wind. When the wind even gets lower, we add a little thrust from the electric engine (still quiet) and get our apparent wind up enough to maintain our speed.” 

portfolio